Tuesday 10 December 2019

Christmas Mug Rugs

Christmas will be here whether we are ready or not.  An hour or two spent in the sewing room may bring a little bit of calm to the season whilst also giving you the opportunity to create a lovely little gift out of little more than scraps.

A mug rug is the perfect handmade gift to give this season.  And I have twelve seasonal mug rugs that are just right for Christmas (and one or two are good all year round).

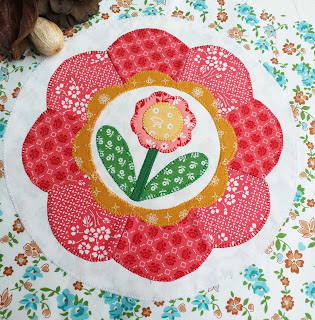
First up is my Mug Rug Alphabet.  This pattern is good for making a named mug rug or creating the perfect hostess gift. (This is an indispensable all-year-round patterns featured.)
Mug Rug Alphabet

Take a break from card writing with either design from my Christmas Delivery mug rug pattern - both designs are included in this $2.50 pattern:

Christmas wouldn't be Christmas without a reindeer or two.  This pattern is one of ten from my Christmas Mug Rugs book - available in PDF format via Etsy or via Amazon.

When wrapping gifts how about popping this fun mug rug into the gift bag as an extra little touch (also from my Christmas Mug Rugs book and another all-year-round pattern):

Prepare for Hanukkah (beginning on Sunday 22nd December this year) or use up some of those festive charm squares with the time-saving Celebration Candles mug rug.  (This pattern will come in handy whenever a birthday or special day arises throughout the coming year.)

And don't forget the holly wreath for the hall table to match the wreath on the door.  This pattern is from my new book 'Christmas on the Side' which enables you to create many mug rugs using any 6" block.

The next two mug rug designs are also from the Christmas on the Side pattern book - the Penguin Stack sidebar with nine-patch block (one of six blocks included in the book):

And a baubles sidebar paired with a decorated Christmas Tree applique block (also included in the book):

This is just a taster of some of the mug rug patterns I have designed specifically for the Christmas season.  Unsure which to choose?  Then grab one of my two pattern books (Christmas Mug Rugs or Christmas On-the-Side) and you are sure to find a design to suit everybody.  
Christmas Mug Rugs pattern book
Available for immediate download from ETSY or in paperback via Amazon

Christmas-on-the-side pattern book
Available for immediate download from ETSY 

Until next time .....

Thursday 28 November 2019

Black Friday Sale at The Patchsmith's ETSY Store


Here's a first - a Patchsmith sale.  I thought it might be fun to join in the Black Friday and Thanksgiving celebrations by taking 20% off the price of my PDF mug rug pattern books available via ETSY.  

You could go all out for Christmas with my two Christmas mug rug pattern books:
Santa, reindeer and three wise kings!

Penguins, baubles and trees

Or you could indulge your hobby:
Sewing, knitting, photography or baking.They are all here.

Perhaps you want to make a fun and functional gift for an animal lover:

Saving money?  Then how about turning some of those unused 6" blocks you have into a 'thank you' gift for a hostess or teacher:
Hearts, birds and bees transform any 6" block.

Oooh how spooky - I nearly forgot the book that is perfect for Thanksgiving:
Turkeys and pilgrims, pumpkins and ghosts.

Or maybe, just maybe you want to grab yourself a reason to escape into your sewing room at this busy time of the year.  Head on over to my ETSY store for the Patchsmith's first ever Black Friday sale - but be quick - sale ends Sunday 30th November 2019.


Sunday 3 November 2019

Granny's Garden Blocks 37 and 39

Granny's Garden Block 37
We are on the home straight for the Granny's Garden Bedrunner.  This week saw the completion of Blocks 37 and 39 - the former being very simple applique and the latter being a bit more work but made easier by reducing the layer.

Let us look at Block 37 first.  This flower block is very similar to Block 5 except it has two more leaves.  Nothing difficult here.
Remember Block 5 - way back in week 2?

Block 39 is not overly difficult either but it is a bit more work.  If you repeat the method used for Block 9 -you can reduce the layers.
Granny's Garden Block 39

It is also a bit of a tight squeeze fitting in the flowers and leaves into the inner circle.  But you can always trim them just a little if it helps.

Next week I will be making the last of the fourteen blocks needed for my bedrunner - Block 41.  So until then ......  


Wednesday 23 October 2019

Granny's Garden Blocks 27 and 31

Granny's Garden Block 27

Block 27 is exactly the same as Block 9 except it has a wider scalloped ring.  So be sure to check out my blog for Block 9 as it shows how to reduce the layers to just one using the 6” circle template.

Granny's Garden Block 27

And Block 31 appears the same as Block 14 but beware as the inner scallop border (Sew Simple Shape I24) is different and you will not be able to use the same method as I used for Block 14.  
The inner scallop means you cannot take the shortcuts used for Block 14.

Instead I would recommend that you mark a 4” circle tracing onto the I24 scallop and the I25 Dresden tracings – making sure both are centered.  Then, once you have fused and cut out the Dresden and the scallop, you can cut out the inner 4" inner circle which will allow the white/cream background to show through.  
The 4" cut out of both the scallop inner border and the Dresden should match as close as possible.

You will need to lay the scallop donut so that it overlays the Dresden donut exactly so it is really important that your tracing and cutting are accurate.  It is a little tricky but it does work.  To save time however, you can create the Dresden using just four 5” squares as shown HERE for Block 11. 

That is another two blocks complete to make eleven blocks done – only three more to go (blocks 37, 39 and 41).  This bed runner could be ready in time for Christmas.

Sunday 13 October 2019

Granny's Garden Block 26

Granny's Garden Block 26

This week’s flower blocks is an easy one – and even easier because quick fuse applique.  The only fabric you need is one 6” x 5” rectangle for the flower and two 9” x 2” strips from two different fabrics.
All that is needed for Block 26

For the leaves you stitch the two 9” x 2” strips together along the 9” length and press the seam open.  
I call this method strip applique!

When you trace the leaves trace a line centrally from one leaf point to the other as shown before.  You can then line up the traced line with the seam of the leaves on the BACK of your patch before fusing the tracings in place.
Line up the traced center line with the stitched seam.

For the flower, Lori cuts three different shapes but there is no need when you are using quick fuse applique.  Firstly trace Sew Simple Shape I7 and then trace two Sew Simple Shape I11s on top, so that the tips of the I11 shapes are just touching centrally in the middle of the I7 shape and the curves of the I11 shapes are lying almost along the bottom of the I7 tracing. (It makes more sense when you see the tracing below).  
Three become one!

Fuse this onto the BACK of the 6” x 5” rectangle and cut along the outer outline to create a tulip head. 
Three simple pieces make such a pretty flower

You will need a 4½” length of stem (see HERE for how easily I cut my stems).   Fold the background circle in half to help when playing the flower, leaves and stems centrally.
You can just see the finger crease along the center of the white circle

Fuse, stitch and admire. 
Fused and ready for stitching

That is nine blocks done and only five more to go for my Granny’s Garden bed runner.  Woot!

Friday 11 October 2019

Granny's Garden Bedrunner Blocks 20 and 24

My Granny's Garden bed runner is coming along nicely!

I am all caught up on the Granny’s Garden sew-along.  I only need fourteen blocks for my bed runner and week 5 saw me making Block 20 and week 6 saw me making Block 24. That is a total of eight blocks to date. 
Block 20 is a two-way Dresden block
Block 20 is another Dresden block and it is made in the same way that we made Block11.  I used four 5” squares, two from each fabric - see the tutorial on how.  I even had time to fussy cut the center.

Block 24 complete with fussy cut middle.
Block 24 is a lovely flower block.  It was a simple put together leaving me with plenty of time again to fussy cut the middle from one of Lori’s Granny Chic fabrics.

Can you see a pattern here?  I am creating my bedrunner from seven flower blocks and seven Dresden blocks.  Next up is Block 26 another flower block and I have a shortcut for cutting and stitching that flower.  But more on that next time ....

Tuesday 8 October 2019

Granny's Garden Bedrunner Blocks 14 and 16

Granny's Garden Block 16

I have been without internet for a little while so it is time to catch up and I am starting with week 4 for my Granny’s Garden bedrunner - which means two blocks - Block 14 and Block 16.  

For Block 14 I wanted to reduce the layers as I am using the quick-fuse method and it is a little fiddly.  Here is how I did it.....

Trace Sew Simple Shape I25 and mark the lines across the middle.  Make a mark along each middle line 1¼” in from the outer edge of the Dresden like so:
Make a mark 1.25" in from the outer edge
on each line.

Then join the marks together with straight lines to create an eight-sided middle.  
Join the dots to create an octagon middle

To make sure this will work lay Shape I27 over the tracing and the eight-sided tracing should be covered completely by Shape I27.  
Don't cut out anything until you know the scallops will cover your eight-sided tracing!

Once you are happy, cut ¼” outside of the outer tracing of I25 and cut ¼” inside the middle tracing as shown.
A Dresden Donut!

Next you need to trace Shape I27 and trace a 4” circle centrally in the middle of the tracing.  Yet again cut ¼” outside of the outer traced line and ¼” inside the 4” inner tracing as shown, to create a scalloped ring.
A Scalloped Donut!

Create the Dresden patch as per Lori's tutorial.  Then fuse Shape I25 to the back of the Dresden matching up the traced lines with the seams.  
Match the lines to the seams as best you can.

Cut out accurately around the outer and inner traced lines as shown to create a Dresden donut.
A very pretty Dresden donut.

Fuse Shape I27 to the wrong side of the green scallop fabric before cutting out accurately around the outer and inner traced lines to create a scallop donut..  
Pop the middle circle of fabric into your scrap box for later.

Once this is done – and it is quite a bit of tracing and cutting – you can then layer the Dresden centrally onto the background cream circle and position the green scallop donut over the top to cover the cut inner edge of the Dresden donut.   
Fuse centrally onto your background.

Stitch around the outer edges of the Dresden and the outer and inner edges of the scallop donut.   
It is a lot of stitching - thank goodness my machine LOVES blanket-stitch.

Finally position and stitch the four petal shapes before fusing and stitching a small circle on top. 
I fussy cut the middle circle for a little extra prettiness.

Phew – quite a bit of work but well worth it – such a pretty block. 
Granny's Garden Block 14.

After that Block 16 is a breeze.  Cut your fabric pieces and lay them out so that the leaves just touch each other centrally,.  

Then lay a strip of stem over the top of the leaves and tuck it under the middle flower petal.  Simple. 
Stitch the flower top and stem in place first - it will keep the petals and leaves in position until you stitch them down.

So there you have it – another two blocks done.  I have completed a further three blocks to bring me bang up to date but more about that next week.  Until then ......