If you want a mug rug pattern book that turns ANY 6” patchwork, embroidery or applique block into a fun and functional mug rug, look no further than the One Block Mug Rugs pattern book.

If you can afford just one mug rug pattern book then this is the book to buy. It contains ten sidebar designs that will go with any 6” block of your choosing.
 |
And to get you started it also comes with easy instructions for the seven 6” blocks featured in the book.

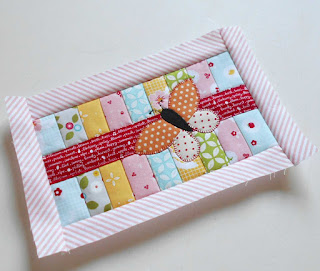
You can mix and match the blocks with the Sidebars to create a myriad of mug rugs. In this example I have paired the Patchsmith Daisy block with the Scallop Sidebars.

And then I paired it with the Beehive Sidebars:

And also with the Checkerboard Sidebars:

Another example is the Stars and Stripes Sidebar which goes very nicely with the Mug-of-Tea Block:

And looks equally as good with the Patchsmith Star block:

But, if you make the Stars and Stripes Sidebar up in novelty fabrics, you get a totally different look:

Leaving you free to pair the sidebars with ANY 6" block of your choosing - not just those in the book. Perhaps you have a block or two left over from a sew-along:
 |
| Here I have paired the Courthouse Steps Sidebar with the Splendid Sampler's Coneflower block |
 |
| Here I have partnered the Stars and Stripes Sidebar with a Lori Holt Cozy Christmas block. |
Maybe you have a sampler block that you created to test your fabric combinations. If so just add sidebars to the block to create a pretty, functional mug rug for your sewing table.
 |
| The Scallop Sidebars have been added to the Cornerstones Block from my Sampler Pattern Book. |
The options are endless with this versatile pattern book. Especially as the One Block Mug Rugs book is available for immediate download from my Etsy Store and it is also available in paperback format via Amazon.
So join with me and find out just how much fun mug rug making can be.