
 |
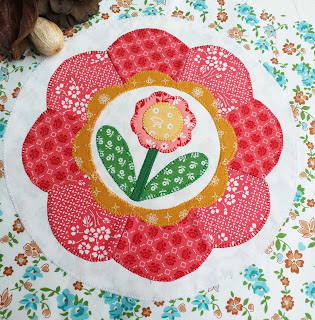
| Granny's Garden Block 27 |
Block
27 is exactly the same as Block 9 except it has a wider scalloped ring. So be sure to check out my blog for
Block 9 as
it shows how to reduce the layers to just one using the 6” circle template.
 |
| Granny's Garden Block 27 |
And
Block 31 appears the same as Block 14 but beware as the inner scallop border (Sew Simple Shape I24)
is different and you will not be able to use the same method as I used for
Block 14.
 |
| The inner scallop means you cannot take the shortcuts used for Block 14. |
Instead I would recommend that you mark a 4” circle tracing onto the I24 scallop and the I25 Dresden tracings – making sure both are centered. Then, once you have fused and cut out the Dresden and the scallop, you can cut out the inner 4" inner circle which will allow the white/cream background to show through.
You will need to lay the scallop donut so that it overlays the Dresden donut exactly so it is really important that your tracing and cutting are accurate. It is a little tricky but it does work. To save time however, you can create the Dresden using just four 5” squares as shown HERE for Block 11.
 |
| The 4" cut out of both the scallop inner border and the Dresden should match as close as possible. |
You will need to lay the scallop donut so that it overlays the Dresden donut exactly so it is really important that your tracing and cutting are accurate. It is a little tricky but it does work. To save time however, you can create the Dresden using just four 5” squares as shown HERE for Block 11.
That is another two blocks complete to make eleven blocks done – only three more to
go (blocks 37, 39 and 41). This bed
runner could be ready in time for Christmas.


