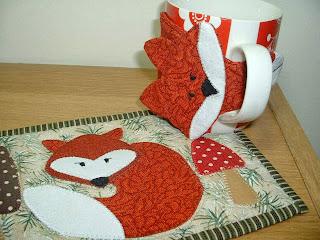
Tuesday 31 December 2013

New Year - New Projects and New Friends

http://www.flickr.com/groups/2154636@N22/
Check out all the 2013 projects here.
I am pleased to announce that Margaret was chosen to receive a fat quarter bundle of pretty fabrics celebrating a year of fun and friends for the Across the Pond Sew Along group.  Don't worry if you didn't get a chance to join in - we will be continuing throughout 2014 and Susie will be announcing the first project for 2014 very shortly.

In the meantime I want to highlight two projects that may be the perfect start to 2014.
 
http://fatquartershop.blogspot.co.uk/p/quilty-fun-sew-along-and-blog-tour.html
Firstly – you will have heard me chatter about the Quilty Fun sew-along group.  This is a relatively quick and easy sew-along to create a great wall quilt designed by Lori Holt using blocks from her Quilty Fun book.
http://www.flickr.com/photos/79143602@N04/11484491316/
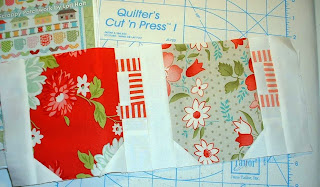
Week 7 - Cups
We have just finished week 7 and week 8 doesn’t start until 6th January so if you haven’t started yet there is plenty of time to catch-up. 
http://thepatchsmith.blogspot.co.uk/2013/12/quilty-fun-sew-along-baskets-of-geese.html
Weeks 4 and 5 - Click on the picture for a quick way to make flying geese.
I say ‘plenty of time’ because the blocks are quick and simple, taking little more than an hour - with the exception of Week 4 (but I have some hints to make that block a little quicker which you can check out here).

You will need the book to join in with the Quilty Fun sew-along so if you want to join in something straight away you should check out my second sew-along choice for 2014 – the Wishes Quilt-Along.

http://fatquartershop.blogspot.co.uk/p/wishes-quilt-along.html
Wishes Quilt Along

This sew-along is in support of the Make-A-Wish foundation and if you wish to make a donation as a thank-you for the patterns then you can via the Fat Quarter Shop blog but this is purely optional.  (The FQ Shop and Moda will match all donations to the tune of $10,000.)  

The Fat Quarter shop will post a FREE new block on the first of every month (for a glimpse at all the blocks click on the picture above).There is also a Flickr group where you will be able to see all the different blocks made by people from around the world.  This is the place to also join in discussions or ask questions via the group – a great way to make new friends and learn some new techniques. 

So there you have it – a couple of projects to keep you occupied in the New Year.  Which just leaves me to wish you all ......

A Healthy and Hearty New Year

Sew until next time .....

Saturday 21 December 2013

Patchiqué Week 6 – Blocks 11 and 78

http://www.flickr.com/groups/2445878@N22/
Well things have moved up a notch with Block 11.  The book details 49 pieces in this 9” square – phew!   But I took a shortcut as I so often do. 
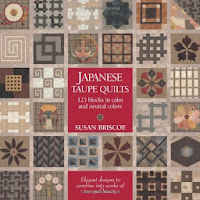
Block 11 from Japanese Taupe Quilts
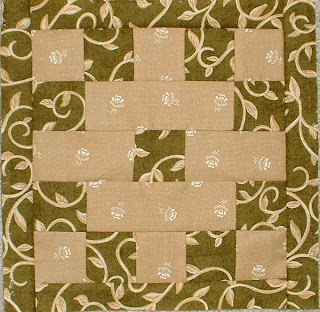
The block is called ‘Kasuri koshi’ (Kasuri check) and it is a lovely looking block.  To speed up the process and cut down the number of pieces I strip pieced two sections as follows:

Section 1:     
From A cut three 2” x 7” strips
From B cut two 1¾” x 7” and two 1½” x 7” strips 

Section 2:     
From B cut three 2” x 7” strips
From C cut two 1¾” x 7” and two 1½” x 7” strips 

Stitch the strips together as shown below before pressing all seams in one direction.  Then from Section 1 cross-cut three 2” strips and from Section 2 cut two 1¾” and two 1½” strips.

Then it is a simple case of stitching the strips together as shown below:
I say simple but it is only simple if your cutting is accurate and your seam allowances are accurate (scant ¼”).   My way is quicker and less fiddly but it still requires matching of seams.

http://www.flickr.com/photos/79143602@N04/11484498173/in/photostream
Block 11 Patchiqué Style
I have to say, I wouldn't make this one again. 

This block is marked simple in the book yet I would mark it medium.  This is a little worrying as I haven’t even started on the ‘difficult’ blocks yet!

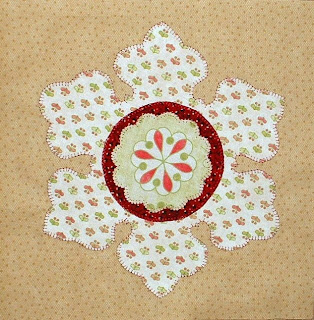
And so I turn to the appliqué block for this week, Block 78 ‘Rokuyō’ (translated as hexagonal flower). 
http://www.amazon.co.uk/gp/product/1568363788/ref=as_li_qf_sp_asin_tl?ie=UTF8&camp=1634&creative=6738&creativeASIN=1568363788&linkCode=as2&tag=manionehundth-21
Block 78 Photo from the book
The template for this block requires you to fold a square of fusible webbing into quarter squares and cut it out as one would do when making a paper snowflake.  A little tricky but doable.  I have not added detailed stitching yet but I think I will add a running stitch outlining the center motif. 
http://www.flickr.com/photos/79143602@N04/11484498313/in/photostream
Block 78 - Patchiqué Style
I like this block – it is detailed yet quite quick to do.  So the time spent on Block 11 was recovered on Block 78.  Oh and a little tip:  when cutting circles do not move the scissors to cut but keep them still and move the fabric.  This will create a smoother edge.

Well there you have it - the first twelve blocks in the Patchiqué project (you can check them all out here).  Next time I will be patching Block 15 and appliquéing Block 75. 

Which just leaves me wishing you all a very Merry Christmas and a New Year full of fabric, fun and friends.
 
Sew until next time.....

Sunday 8 December 2013

Patchiqué Week 5 – Blocks 10 and 110

http://www.flickr.com/groups/2445878@N22/
Susie made me this lovely little button.
Click on it and you go through to the Flickr Group.
What a lovely week on the Patchiqué trail with Block 10 ‘Kasuri kawari hana' (a Kasuri flower variation). 
Block 10 from Japanese Taupe Quilts
This block contains a few more pieces – or so it seems on first sight.  But actually I loved making this block.  I didn’t know I would when I started to make it but it is really simple and very effective.  
http://www.flickr.com/photos/79143602@N04/11266899526/in/photostream
Block 10 Patchsmith Style
It is rated as ‘easy’ by Susan Briscoe and I completely agree.  In fact, it my favourite block so far.  I used a Japanese print for the dark colour and a taupe for the light. 
 
The applique block for the week is Block 110 ‘Matsu guruma’ (translated as Pine Wheel). 
Block 110 from Japanese Taupe Quilts
At first I thought you stitched the stems to the leaves and then cut the six pieces out but this isn’t the case.  You actually construct the leaves from two pieces of bias cut fabric stitched together and then overlay some fusible bias tape.   I tend not to do ‘bias’ cutting – not for binding and not for applique so instead I cut the leaves from a directional-print fabric. 
 
In order to create all six leaves I stitched two 28” x 2½” strips together and then cut all six leaves from this piece – so much quicker than doing it individually.
 
I also don’t have fusible bias tape so I traced 4¼” x ¼” stems onto fusible webbing and fused them to contrasting fabric before fusing and stitching them over the seam of each leaf.
http://www.flickr.com/photos/79143602@N04/11266909814/in/photostream
Block 110 Patchsmith Style
Finally I fused a circle in the middle in place of a yo-yo.  So a little Patchsmith variation but I am happy with the outcome.

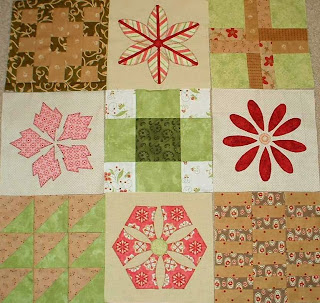
That is ten blocks made so far and I lay some out together to get a feel for the finished quilt.  It still lacks some unity but I think this will come as I make more blocks and then add sashing. 
Nine of the ten blocks made so far.
Before I go, don’t forget to enter the free Across the Pond Give-Away.  You have until Christmas Eve.

Sew until next time ........

Friday 6 December 2013

Quilty Fun Sew-Along - Baskets of Geese

http://fatquartershop.blogspot.co.uk/p/quilty-fun-sew-along-and-blog-tour.html
To date the Quilty Fun sew-along (based on the book of the same name by Lori Holt) has been the perfect pre-Christmas sew-along with a quick and easy project each week.  The projects to date have been suitable for beginner and experienced quilters alike. 
http://www.flickr.com/photos/79143602@N04/10886191796/in/photostream
Week 1 and 2 - Apples and Stars
However, not so week 5 where we are faced with the ominous task of making thirty-one 2½” x 1½” flying geese blocks.  These are teeny-tiny blocks and they need to be to exact size because they are going to fit into the finished project in three different places.  The method Lori uses in her book to make the geese is a method I first came across many years ago in a book called “Sew A Row Quilts” by Karen Hellaby. 
http://www.amazon.co.uk/gp/product/0954092805/ref=as_li_qf_sp_asin_tl?ie=UTF8&camp=1634&creative=6738&creativeASIN=0954092805&linkCode=as2&tag=manionehundth-21
I didn’t like it then but that was a long time ago and to date, I have liked Lori's techniques.  So I decided to give the method another try.  After making twelve geese I was disappointed to find only half finished to the correct size.  I know some people love this method but I'm not one of them!  (Tip:  Be careful when using pencil markings as the pencil can come off onto the iron and transfer onto your fabric.)
http://www.flickr.com/photos/79143602@N04/11036101506/in/photostream
Week 3 - Courthouse Steps
These geese were 'getting-my-goose' so I reverted back to my preferred method for making little geese blocks - the 3D flying geese method (tutorial here).  I love this method – it is quick (only one straight seam per goose) and I like that I can see where the goose point is when I stitch the units together. One hour later and my geese units are all stitched and finish at the correct size.  You need to make three units – one with six geese (6½” x 2½”), one with twelve geese (12½” x 2½”)and one with thirteen geese (13½” x 2½”).
http://www.flickr.com/photos/79143602@N04/11238400993/in/photostream
Week 4 and 5 - Baskets and Geese
But that is the fun of a sew-along – everybody has a favourite way of working and we pool our knowledge and share our tips to get the job done - one way or another.  And as somebody recently posted in the Quilty Fun Flickr group - it is such a good way to try different methods and learn something new. 
Not a goose in site ..... or is there?
If you really can’t get the hang of the tiddly flying geese blocks you can always cut 2½” x 1½” rectangles and use those in the finished project – it will still look good.  In fact, you may not even notice that your geese have flown!

Sew until Sunday when I will be posting another two Patchiqué blocks ......    

Saturday 30 November 2013

Across the Pond Christmas Project and Give-away

http://www.flickr.com/photos/79143602@N04/11139291126/in/photostream/lightbox/
I love December – it is a month of joy and gifts and chocolates on the tree.  It is also time for another Across the Pond project but the last thing any of us need in December is a HUGE project.  So I have the perfect, one-hour make for you this month (okay, some may take one-and-a-half-hours but hey – what’s 30 minutes between friends?)

My choice of project this month is the cup cosy or ‘mug hug’ as I like to call them.  There are plenty around but two of my faves are:

Sew Happy Geek – this is the simplest and most versatile.
http://sewhappygeek.co.uk/index.php/2011/05/24/tutorial-tuesday-coffee-cup-cosy-with-free-pdf-template/
You can patch it, applique it or use one piece of designer fabric.  Quick, easy and effective.  You could even make a co-ordinating mug hug with left-over fabric from another project (mmmm maybe a Patchsmith mug rug?)  What a great little present that would be for the Secret Santa.
Note:  Ignore the comment about needing an account to download - this is no longer true.

And then there is Staci over at Crafty Staci who has a selection of FREE patterns and tutorials.
http://craftystaci.com/coffee-cup-sleeves/

Now these are some seriously cute, fun designs and I chose to make her fox mug hug to match my Fox mug rug and coaster
http://www.flickr.com/photos/79143602@N04/11139254335/in/photostream/lightbox/
This mug hug went together really well - it was a little fiddly turning it right side out but my trusty chop-stick came to the rescue.  It took little more than an hour.
But I'm a greedy girl who wants all the presents on her wish-list.  I also wanted a mug hug for my pen pot.  My pen-pot-mug is quite short so I simply patched eleven 3" x 1½” strips together to give me a finished mug hug measuring 10½” by 2½” tall.  Then I appliqued the little blackbird from my Seasonal Tree mug rug pattern and hey-presto - a cosy country pen-pot.
Blackbird Pen Mug Hug
Then, just as I was about to fill up one of these mugs with a nice cup of Italian coffee, an email popped up to tell me that Amy (of 'Amy Made That' fame) had made a lovely tree skirt from Kate Spain's 'In From the Cold' winter fabrics.  This reminded me of the left-over charm squares from my JOY banner. And before I could say, 'Yes Santa, I have been good ...... at least once this year' - I had made another slightly larger version.  This one is reserved for my Christmas cocoa.
To match Amy's Christmas Tree Skirt
(I just need to figure out a way to get her to send it to me .....
perhaps I could tell her it is needed for a photo shoot!)
But you don’t have to make these cute little cosies just for mugs – what about jars of preserves (jam, marmalade, pickle) - or long, long hugs for bottles of wine.  I am sure you can come up with some other ideas as well.  

Oooh, that has given me an idea – how about a competition?  ‘YAY’ I hear you all screaming.  Just leave a comment telling me how you will use your mug hug.  I will pick a winner, at random, on Christmas Eve to receive a small fat quarter bundle.   (Make sure I can contact you to be in with a chance.)  And everybody who posts a photo of a mug hug onto the Across the Pond Flickr Group will get an extra chance to win.

Sew until next time ....... 

Sunday 24 November 2013

Patchiqué Week 4 – Blocks 8 and 73

http://www.amazon.co.uk/gp/product/1568363788/ref=as_li_qf_sp_asin_tl?ie=UTF8&camp=1634&creative=6738&creativeASIN=1568363788&linkCode=as2&tag=manionehundth-21
Block 8 in Japanese Taupe Quilts is called ‘Uroko’ which translates to ‘scales’ and you can see why.  It is all points and balance. 
Block 8 from the book
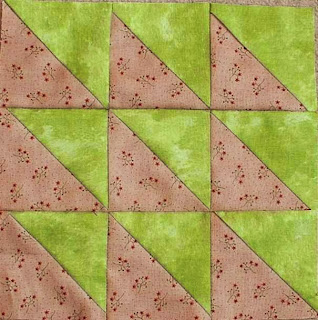
This block is rated ‘simple’ in the book and it is, just so long as you are spot on with your half-square triangle (HST) blocks.  To make sure mine were just right, I cut my initial squares to 4” and made half-square triangles which I then trimmed to 3½”.  The trimming took quite a bit of time but it saved me lots of unpicking when it came to matching up seams.  I also pressed the straight seams (not the diagonal ones) open to reduce bulk.

http://www.flickr.com/photos/79143602@N04/11033927756/in/photostream
Block 8 Patchique Style

I know there is a lot of debate about pressing seams open – I don’t normally do it, but after making the Birds-in-the-Air block recently, I have found it reduces bulk when sewing blocks together.   I am pleased with how this block turned out although it was a little boring to make.

So on to the appliqué book which was Block 73 ‘Yama fubuki’ (mountain snowstorm). 

Block 73 from the book
I didn't know if I would like this block as it has as many points as Block 72 (Klingon warship block).  But I was pleasantly surprised - I think the fabric I chose softens the sharpness of it.  I had two 5” charm squares that I thought would go particularly well but I wasn’t sure if I could cut all six pieces from the charm squares.  So I traced two 5” squares onto the paper side of my fusible webbing and then traced the template into the squares.  Yep, I could get three templates in each square.  This block was easy to do with Bondaweb and turned out well.  Yet again I didn’t use the protractor but ‘eyed’ it. 
http://www.flickr.com/photos/79143602@N04/11033928466/in/photostream
Block 73 Patchique Style


After all the points of the last two blocks I fancy something a little more rounded so my next appliqué block will be Block 110.  This is one of the things I like about this book – you can dip in here and there and do whatever takes your fancy.  Block 110 combines patchwork with appliqué (my speciality) whereby you patch the sections and then appliqué them on.  As for patchwork – Block 10 awaits.

Sew until next time........

Saturday 16 November 2013

Blocks Away - Friday Night Block Party

http://summercrafter.com/

Do you remember the Shooting Star block that I made for the Friday Night Block Party?  (Just click on the picture below for the free pattern).   
http://www.craftsy.com/pattern/quilting/home-decor/shooting-star-cushion-pillow-top/65112 
Well Elaine who hosts the Block Party over at Summer Crafter is giving away two charm packs, courtesy of the Fat Quarter shop, to one lucky person who links a block in November.   It can be any block you like.  Elaine is making the Farmer's Wife quilt blocks and  Susie and I are joining her.
Farmer's Wife Block 1 - Attic Windows
I’m hooked on these little 6” blocks.  They are ideal when I only have an hour or so, after a busy day at work.
Farmer's Wife Block 2 - Autumn Tints
There is a book that details all the blocks and contains templates but I prefer to patch my blocks which means I get to do a little math.
Farmer's Wife Block 5- Bat Wing
But I love patchwork and I quite like math so it is no hardship. 
Farmer's Wife Block 8 - Bouquet
This month Elaine is holding a draw at the end of November to win two charm packs – all you have to do is link up a block sometime this month – it doesn’t have to be the Farmer’s Wife – it can be any block you like. 
Farmer's Wife Block 9 - Box
You could even link up a Patchiqué block or a block that you have created for another project (like Quilty Fun). 

Sew pop on over and check it out.

Sunday 10 November 2013

Patchiqué Week 3 – Blocks 4 and 72


Japanese Country Style
This week, on the Patchiqué journey to enlightment, I continued with simple patchwork in the form of Block 4 ‘Yotsu kumi sujikai’ (translated ‘four paired braces’). 
Block 4 from the book
It was so quick and easy that it went without a hitch so nothing to report here.
Block 4 Patchique style!
And likewise for applique Block 72 ‘Itsutsu matsukawabishi ' (translated as ‘five bark diamonds’).
Block 72 from the book
This block is rated as 'advanced' in the book yet I found it quite simple - especially using the quick-fuse method (raw edge appliqué) - so I am not quite sure how the blocks earn their rating.   And one of the things I like about Japanese Taupe Quilts is that all templates within the book are printed at the exact size.  The instructions suggested placing each diamond at 72 degrees but I just eyed it up and it seems to have worked out fine.    
Does this block remind you of anything?
However, I don’t like this block.  It isn’t that it was difficult – it wasn’t.  It isn’t the fabric – I love the fabric (though the photo was taken at night so the background doesn’t show its true cream beauty). Nope - the problem I have with this block is I don’t see bark diamonds – I see Klingon warships.  And in a quilt where the blocks are meant to “combine into works of tranquil beauty” it just doesn’t feel right to have Klingon anything let alone warships!  Is it just me or do you see it too?
Oh well, in the interests of peace within the Federation - the block stays.  But let's hope that next fortnight's blocks (patchwork block 8 and appliqué block 73) bring us back into the realm of Japanese calm.

rut until poH veb ........ (Klingon speak for ‘sew until next time......’)

Friday 1 November 2013

Bobbing Apples across the Pond

http://www.flickr.com/photos/79143602@N04/10615088354/in/photostream
Halloween is such fun isn’t it?  We lit the pumpkins and the trick-or-treaters came knocking.  But that was yesterday and today is November! 
 
A new month brings with it a new Across the Pond Sew Along project.  This month Amy, from Amy Made That has chosen ‘Apples’ as her theme and she is showcasing a nice selection of projects to whet your appetite.  And Susie has already made a very pretty patchwork table topper.
Susie's Apple Table Topper
Apples are the perfect choice for November here in England as the 5th November is Guy Fawkes Night and apple bobbing is a traditional part of the celebrations. 

One of the projects Amy mentions just so happens to be the very project that I have chosen - Lori Holt’s apple blocks.
http://beeinmybonnetco.blogspot.co.uk/2012/10/the-bee-in-my-bonnet-row-along-row-4.html
Courtesy of Bee-in-my-Bonnet Sew-A-Row Block 4
I stitched three together to create a mug rug wall hanging.   Yes, you heard right - a mug rug wall hanging.  All you need do is add quick corner triangles to the back of a mug rug and it can hang in the kitchen, ready for when you need it.

Apple Mug Rug Wall Hanging
The apple block was a free project in Lori’s Sew A Row Quilt Along from 2012 and the tutorial is really easy to follow.  Unfortunately the cutting measurements are no longer included in the tutorial - I am guessing this is because Lori has recently released the Sew-A-Row quilt in her "Quilty Fun" book. I could've waited for the book to arrive but I am too impatient so I did the math.  Each block measures 4½” wide by 5½” tall (unfinished) so my mug rug wall hanging measures 12½” x 5½” finished.  Two blocks would’ve made a good desk mug rug but I wanted something longer for the pickles and sauces on the Guy Fawkes night table.

And if you decide to make a mug rug for this month’s project and you want to add quick corner triangles to the back – here is how to do it.
 
1.         Once you have quilted your mug rug and before you sew the binding in place, cut two 3” squares of fabric.  Fold the triangles in half, wrong sides together, on the diagonal and press. 
 
2.         Pin them to the top two corners of the mug rug at the back. 
 
3.         Bind the mug rug as you normally do and the corners will be stitched in place at the same time. 

4.         Then all you need to do is insert a chop-stitch or twig into the triangles and hang your mug rug from a nail or tack.
If you use the same fabric for your triangles
as your backing - you'll hardly know they are there!
So now you can make all the mug rugs you want and display them as a collection.  And when you do, don’t forget to post your photos to the Across the Pond Flickr group so we can all have a look.
Sew until next time ......................