Showing posts with label no binding. Show all posts

Sunday, 1 October 2023

Autumn on the Table

Totem Mug Rug - One of ten patterns 
from the Halloween & Thanksgiving Mug Rug book

The nights are turning cooler and the leaves are beginning to change colour.  So I am changing the mug rugs in my house to welcome the Autumnal season into my home.

Mug rugs are such a quick and easy way to create a homely touch.  You can use novelty charm squares (5" squares) as in this Quilt-as-you-Go pattern from my Halloween & Thanksgiving pattern book (also available via Amazon):

QAYG Halloween Fun

Or you can use shades of green, red, brown, yellow or orange from your stash:  

Pumpkin Patch Mug Rug Pattern

You can even turn a pumpkin into a Jack-o-Lantern with a touch of black fabric or felt:

Included in the Pumpkin Patch Pattern

And whilst you are finding scraps of black felt - look for some white to make a couple of fish-bones to add to the Moonlit Cat mug rug:

Moonlit Cat Mug Rug Pattern


The Moonlit Cat pattern is available as a single pattern or as part of the Halloween & Thanksgiving pattern book.  Either way you will also receive the Scaredy Cat version to make as well:

Moonlit Scaredy Cat Pattern
(included with the Moonlit Cat Pattern)

If pennies or time are short then just make a coaster using part of a mug rug pattern:  

Click on the image for the instructions for these spooky coasters

Whatever fabrics you choose to use - a mug rug pattern will help you create a little bit of fabric art for your home this season.   The Patchsmith's Halloween & Mug Rug pattern book will take you from Halloween to Thanksgiving with ten delicious mug rug patterns:

Available in PDF format from Etsy
or Paperback format via Amazon

So join with the Patchsmith this season and enjoy some eerily frugal fabric fun.  Until next time.................

Friday, 21 October 2022

Ghostly Coaster

Ghostly Coaster

Life is busy - I get it.  Even a mug rug just isn't possible - no problem.  But a coaster which can be stitched on the machine and finished by hand - eerily possible.  And here is how using The Patchsmith's Ghostly Duo mug rug pattern (also available in the Halloween & Thanksgiving pattern book) .......

1.   First - choose your fabric (the hardest part of any task for me!).  For each Ghostly coaster you will need:
                   One 6" square
                   Two 3½" x 6" rectangles
                   One 6" square of lightweight batting/wadding
                   One 6" square of fusible webbing
                   Fabric for your ghost 
                  Ghostly Duo mug rug pattern 

(Tip:  I cut my ghosts from an old white linen table cloth as it is a bit thicker than quilting fabric and I know it will wash well.  Felt also works well as it stops the background showing through.)

2.  Fold under 1/4" along the 6” edge of one of the rectangles of fabric as shown and press.

3.  Applique a ghost onto the center of the 6” fabric square following the instructions in the pattern.  Place lightweight batting behind the appliqued square and quilt around the ghost. 
4.  Next lay the two backing rectangles right sides facing upwards, so that the rectangle with the folded edge overlaps the other rectangle slightly, creating a 6” square (the folded edge should lie on top).

5.  Place the appliquéd ghost square on top – right side facing downwards.  Pin to secure.
You should be able to see the quilted line quite easily.  

6.  Now stitch all the way around the ghost, approximately ½” outside of the quilted line.  Accuracy is not essential and smooth corners will work better than pointy ones. 

7.  Once you have stitched all the way around - trim all layers approximately ¼” from the outline stitching.  Take care not to snip any stitches.

8.  Turning out is simple because of the overlapping back.  

(I run my Clover Turner all along the inside of the seam to ensure it is fully turned out.) 
Pink Ghostly Coaster
9.  Give the ghoulish coaster a good pressing and slip-stitch the envelope back closed. 

Easy?  You bet.  So much so you could whip up a whole gang of ghoulish ghosts for your children, nephews, nieces, grandchildren and ... oh yes, yourself.  This method would also work well for other shapes.
Perfect for those Halloween cocktails
And if you would prefer a book of Halloween mug rug patterns you will find a paperback version on Amazon or a PDF version in my Etsy store


Halloween & Thanksgiving Mug Rug Booklet

Until next time ..... enjoy the Halloween fun and games and keep safe.

Tuesday, 14 December 2021

No Binding Mug Rug

Celebration Candles Mug Rug minus the binding

If you don't like binding small quilts or mug rugs - don't.  There is a simple way to finish your mug rugs without having to bind them.  (However, if you do like the finish that binding gives, check out my free handout on the three most popular binding methods HERE.)

Some people like to bind and some people don't

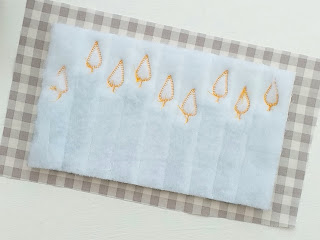
To skip the binding, make up your mug rug top as per the pattern.  When you are ready to quilt the mug rug, omit the backing material and placing the batting behind the mug rug top.  Quilt as desired.  If you are making a QAYG mug rug, like the Celebrations Candle mug rug, the quilting would have been completed as you stitched the mug rug together.

Nearly finished - just need to applique the flames.

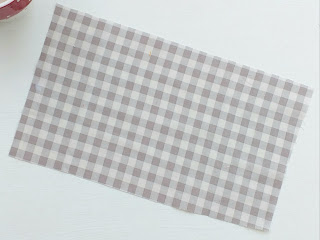
Once the quilting is finished, trim the batting to the same size as your mug rug top.  Place the backing rectangle, RIGHT SIDE FACING UP, on the work table.

Place your backing rectangle right side facing up

Place the quilted mug rug top, RIGHT SIDE FACING DOWN, onto the backing rectangle.  Pin or baste to stop the two layers moving, ensuring you keep both flat and crease free.

Place the quilted mug rug top right side facing down

Stitch around the mug rug top, through all layers, using a 1/4" seam allowance, leaving a 2-3" gap along one side of the mug rug.   TipMake sure to overstitching securely at the beginning and end of your stitching to stop the seam coming undone when turning the mug rug out.

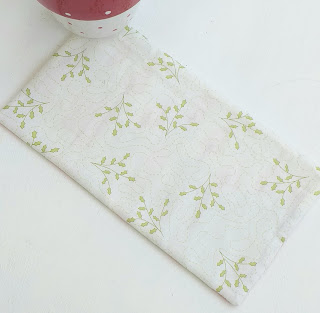
Trim the backing rectangle to the same size as the mug rug top and trim the corners before turning the mug rug right side out.  

The back of the mug rug will hide all your thread ends.

Finally, press and stitch the opening closed.  I find little hand-stitches help the opening remain invisible.

Very small hand stitches close the opening

And there you have it.   A quick and easy way to finish a little quilt or mug rug.

Grey and silver make a sparkling Christmas mug rug.

Wishing you all..........

A VERY HAPPY AND HEALTH CHRISTMAS.