Monday, 12 July 2021

Scrapilicious Patchsmith Sampler Blocks


It has been a while.  Truth be told I broke my elbow mid February and haven't been unable to do much of anything.  But I have just started to ease myself gently back into some sewing.  

I need to practise both cutting and sewing but cutting is proving the most difficult and painful. Thankfully, I have a stash of scraps and a couple of favourite blocks from my Sampler Quilt Blocks pattern book.

Available via Amazon

First up is the Chunky Log Cabin.  

Block 32 - Chunky Log Cabin Block

This is block 32 in the book.  I remade this block with the offcuts that I had available and, I have to say it turned out lovely.

Chunky Log Cabin Block

There is also a Night and Day Log Cabin block in the book but I am building up to cutting thinner strips as my elbow progresses.  

Block 25 - Night and Day Block

However, I did take the opportunity to play with Lori Holt's Haystack Block turning it into a night-and-day version.

A 'Night-and-Day' Haystack Block

Next I thought I would try a little bit more cutting and sewing and chose block 33 from The Patchsmith's Sampler Quilt Blocks book - the Scrap Box.  

Block 33 - Scrap Box

I did have four small half-square triangles already in my scrap box together with another eight perfectly sized squares.  So the cutting was too difficult. 

Scrap Box alternative with HST corners

I will remake this block very shortly using an alternatively to the Kona Snow background fabric - just for fun.

Spring-time Chunky Log Cabin

These blocks are perfect for beginners as it really doesn't matter if your seams, or cutting, aren't accurate - the blocks will still look good.

So I better get back to practising some more as I have new designs I want to create.  Until next time....

Thursday, 29 April 2021

A Hive and a Side Mug Rug

A Hive and a Side Mug Rug

Sometimes a little pattern comes along that I design because it looks good.  I then find out from my customers how much they like it for its simplicity.  The Flag Sidebar from my One Block Mug Rug pattern book is perfect if you are new to patchwork – it is very forgiving due to the ‘give’ in the block and is suitable to any 6” block that might be slightly bigger than the 6½” (unfinished) size.

The Flag Sidebar and the Tea Mug 
(both included in the One Block pattern book)

The Flag Sidebar works really well as a traditional flag – perfect to picnic and holiday gifts.  However, it also works well in non-traditional fabrics.  When teamed with a patchwork, embroidery or applique block, this sidebar will turn any 6” block into a fun and functional gift suitable for young and old alike.

A simple block suits the Flag Sidebar very well.

And here is how simple it goes together.

First pick your block – I picked the Hive block from my Sampler Blocks pattern book

The 6" Patchwork Hive from my Sampler Pattern Book

Picking fabrics is always the longest part of any project for me.  This time I let the dusky look of the charcoal grey on the hive block guide me and went for two grey 5” charm squares.  I added a scrap of green for the upper corner to tie in with the spring colours of the hive.

Two charm squares and a small green scrap of fabric

I then stitched the flag sidebar together – it took just 10 minutes.  

A scrap happy Flag Sidebar

And with a press it was all ready to stitch to the side of my block.

Quick and easy to put together ...

Quilting for me is very time dependent so I did a simple double layer of outline quilting around the hive and then quilted along the seams of the flag and the hive.

Finally, a vintage piece of Debbie Mumm fabric was cut to create the borders.  I love the black-and-white border – it screams county chic to me.

A hostess gift ready and waiting.

There you have it.  Just one of the ten patterns from my One Block Mug Rug Pattern book – available via Amazon or Etsy.


Until next time when I will be visiting another pattern from the book.

Tuesday, 20 April 2021

Scallop Edged Mug Rug - a homemade touch for a unique home


Scallop borders will transform any block into a stunning mug rug

Creating a comfortable, welcoming home can be quick and it can be easy.  It doesn’t have to be expensive or time consuming.  Positioning a homemade mug rug here-and-there is one way to achieve this.

The Patchsmith Daisy Block is one of seven
blocks included in the One Block Mug Rugs book

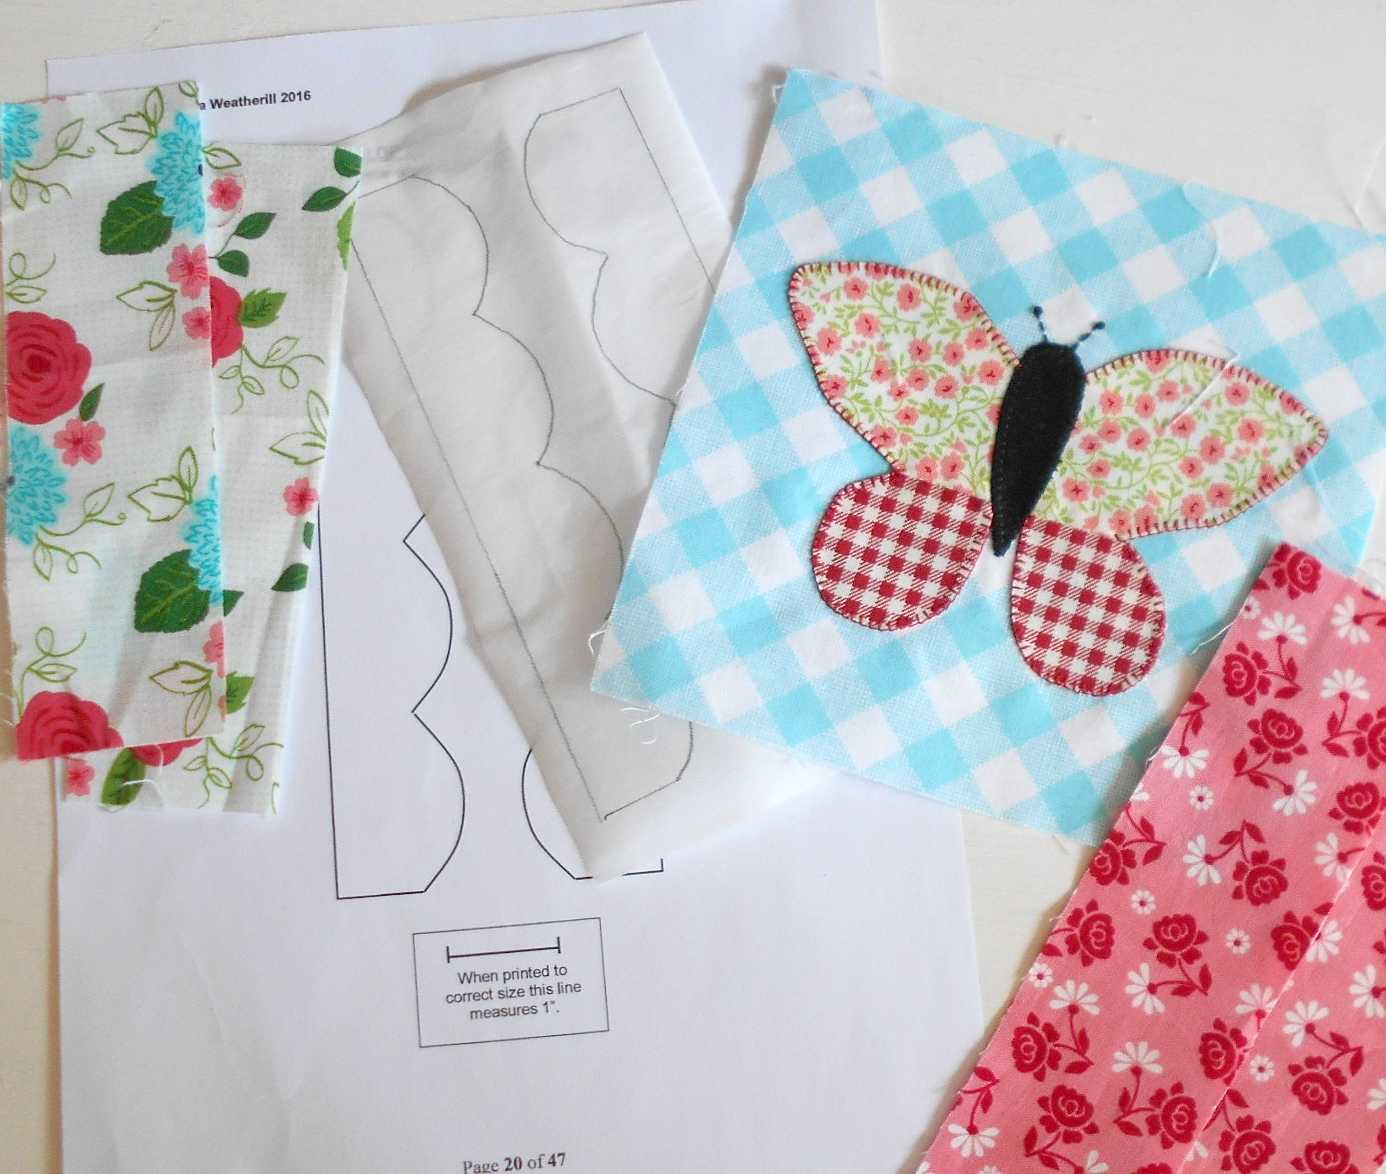
The scallop edged mug rug is quick, simple and inexpensive.  You can use any 6” quilt, embroidery or patchwork block you have to hand.  I used the butterfly block from my Butterfly Patch mug rug pattern which includes templates for creating a 6" butterfly block.

I started with a butterfly Block from my Butterfly Patch pattern


You will need the Scallop Sidebar pattern.
  This pattern is one of ten found in my One Block Mug Rug book – costing just $9.99 in PDF format - it includes seven 6" blocks to get you started.

Ten mug rug designs in one handy pattern book

Alternatively, you can purchase the $2.50 Patchwork Cow mug rug pattern which also details the scallop borders.  

Patchwork Cow Mug Rug pattern

You will also need a very small amount of fusible webbing and some scraps of contrasting fabric.  

The start of something beautiful ....

When choosing the fabric for your scallops it doesn’t matter which is lighter than the other, or busier than the other.  All that is required is that the fabrics contrast enough that the scallops stand out.  I achieve this by laying the fabrics side-by-side; I then go make a cup of tea and when I come back I look again at my choice.  I will know instantly if it works.
 
Lay out the fabrics to see if they go together ....

If you are using a block you have already made the putting together of this mug rug is very quick and very easy – just follow the instructions and use the full-size template included in the pattern.

First, add the sidebars to your block ……

Borders added - quickly and easily ....

Fuse the scallops to the WRONG side of your chosen fabric ………

Scallop tracings fused to the WRONG side of fabric ...

Cut out the tracings accurately once fused ……….

Trimmed and ready for placement ...

 
And then align them with the side edges of the mug rug before fusing them in place.
Ready for finishing ....

From there you simply stitch the scallops securely to the mug rug top – I really love the little blanket-stitch in a contrasting cotton to highlight the scallop.

Use any stitch you like to secure the scallop.s

And there you have it – the mug rug top is finished.  Quilt it as simply as desired (details included in the pattern) before adding binding. 
All finished - and time to make another!

Finally – find a sunny position for this functional mini quilt – some place where you will use it everyday – some place it will add that little touch of uniqueness and colour to brighten your home.
Start turning those unused blocks into gifts for yourself
and others.

Be sure to come back soon when I will be making another mug rug from my One Blocks Mug Rug pattern book.