Wednesday, 7 January 2015

Across the Pond - Sewing Machine Cover

The Patchsmith's Sewing Machine Cover
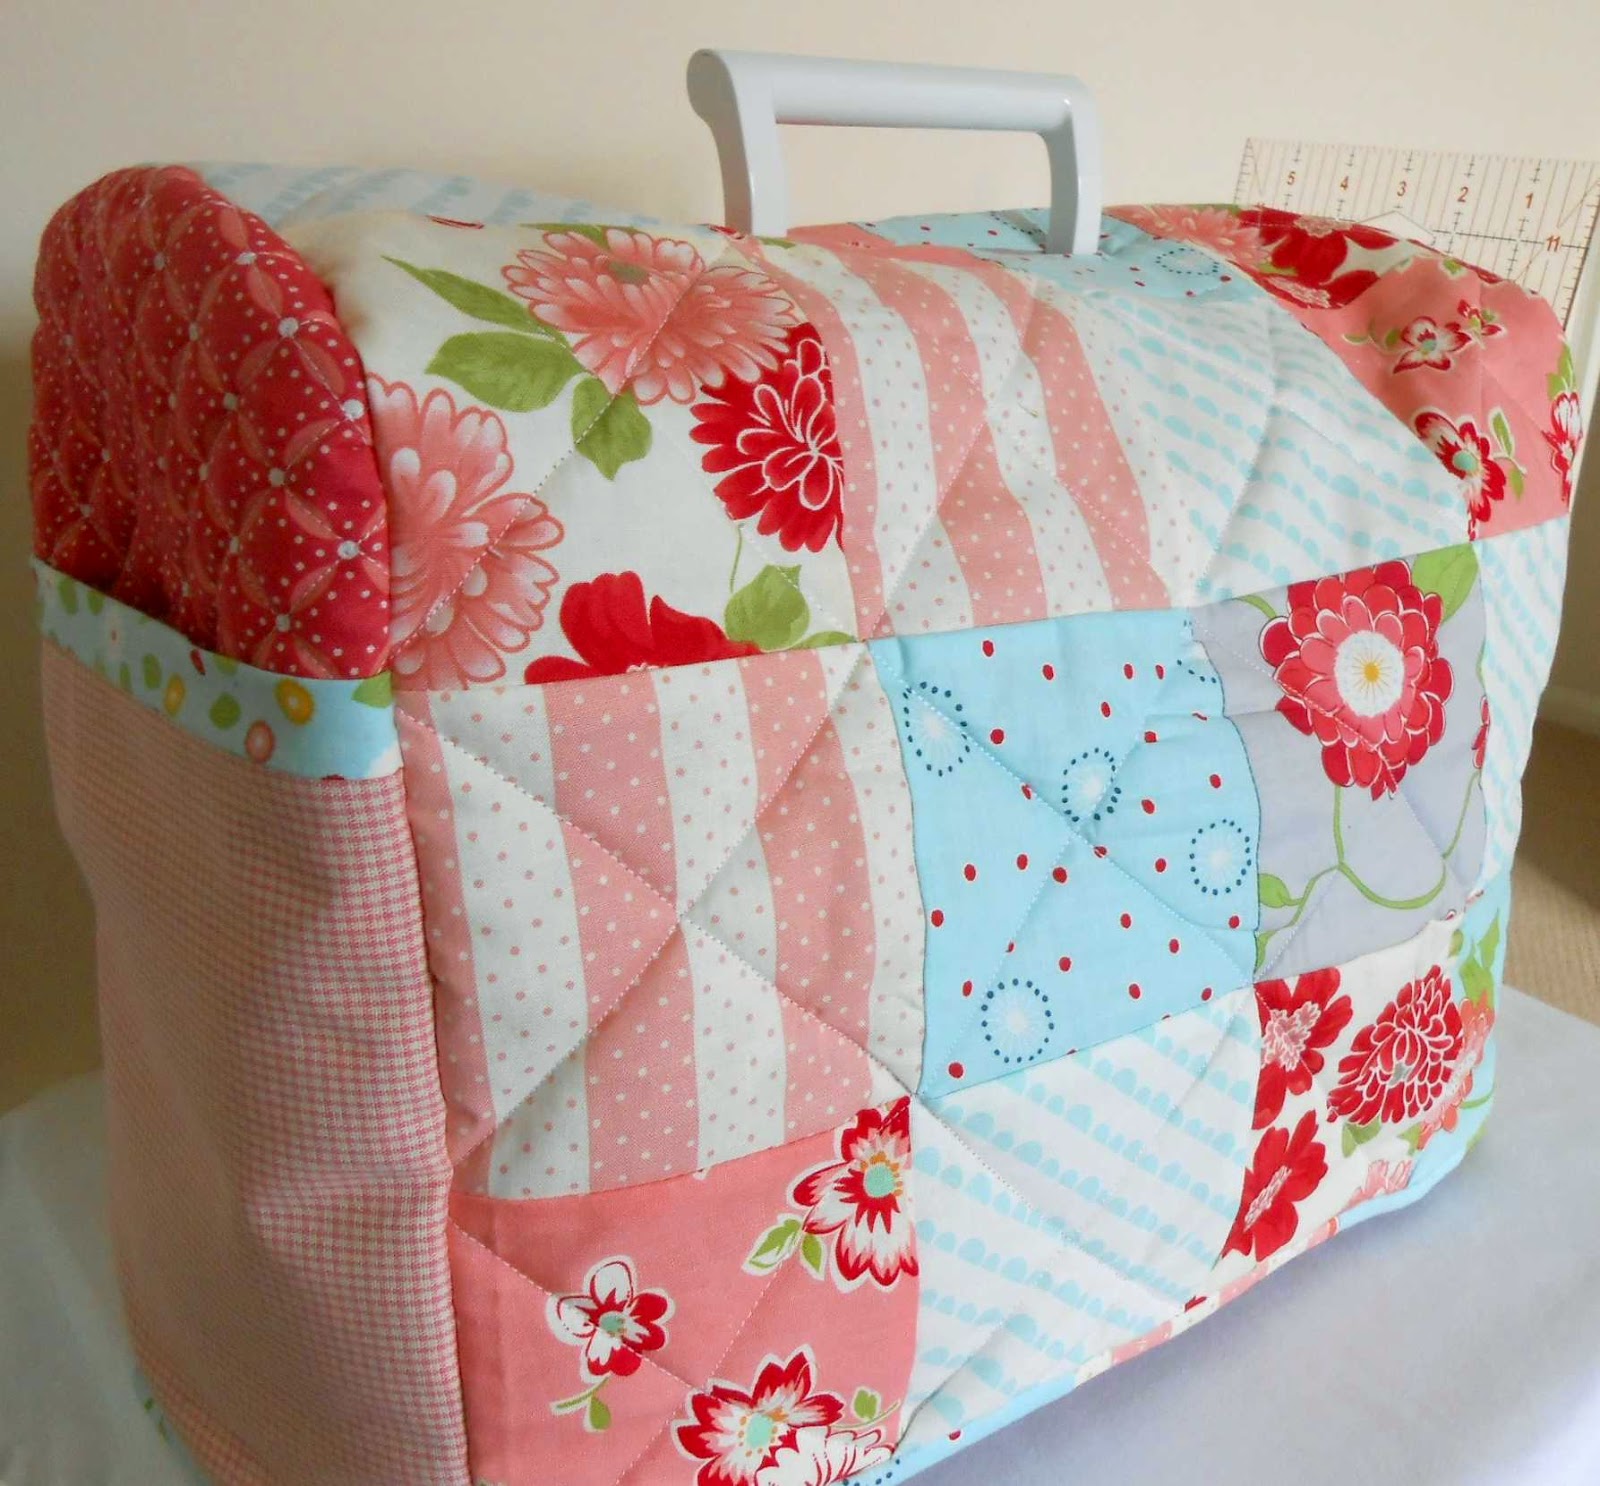
My sewing machine cover is complete and, as promised, here is how I did it (grab a cuppa - this is a long post).

To begin with I measured my machine and listed the measurements on a sheet of paper.  Add 1" to the width, depth and height to allow for seam allowances.   (Note: I have a little Husqvarna Viking H100Q measuring 15” wide x 11-12” high x 8” deep). 
Patchwork Cover from Sew Delicious
I used Sew Delicious’s cover as inspiration and patched twenty eight 4½” (cut) squares to create a panel measuring 28½” x 16½”.  This doesn’t seem big enough given the machine’s dimensions but when I laid it over my machine it draped down the front and back onto the work desk so I knew it would fit just fine even after quilting.
Next I wanted to create a gap for my machine’s handle – essential as I take my machine out-and-about with me. 
Portable Sewing Machine and Cover
I added ½” to the length of the sewing machine handle (for me this was 6½” + ½” = 7”) and did the same for the thickness of the handle (½” + ½” = 1”).   Using these measurements I marked a piece of interfacing with a rectangle measuring 7” x 1” - this would be my stitching line.  In the middle of this rectangle I marked the actual length of the handle (6½”) and drew lines up to the corners as shown.  These would be my cutting lines.
Solid line is stitching line - dashed lines are cutting lines
I placed the lining fabric RIGHT SIDE FACING UP on top of a rectangle of batting (both the lining and batting were 5” larger than my patched rectangle).  I then positioned the patched rectangle on top of the lining, RIGHT SIDE FACING DOWN (thus lining and patchwork are right sides together).  Finally I pinned the marked interfacing rectangle to all layers, in the approximate position of the handle (slightly to the right of centre). 
Using a small machine stitch, I stitched along the solid rectangle marked on the interfacing.  Once this was done I cut along the central line and out to each of the corners as indicated by the dashed line.  NOTE:  Do not cut right into the corners as you may cut through the stitching – cut as close as you dare.  My finished corners are always a little rumpled when using this method as I am cautious of cutting into the stitching.  However, if you do cut through to the stitching you can always re-stitch around the solid line again.
The lining is showing through.  If you gently pull the lining away
from the gap as you press, the lining will disappear from the front of your cover.
Once done, turn right-side out by pushing the patched rectangle through the stitched gap (the lining and batting should now be lying behind the patched rectangle).   Press.
Once pressed the lining is no longer visible.
You can leave the gap as it is and get on with quilting your cover ....
.....or you can do as I have done and top-stitch around the gap before quilting the rest of the cover.    

Next I made the pocketed sides using another blogger's tutorial which is, unfortunately, no longer available.  So here is how I created the pockets ...... For each pocket I cut one pocket lining, one pocket outer - both approximately 8½” (wide) x 8” (tall).  I placed them wrong sides together and bound the top edge using 2" strips of fabric and the single-binding method.  Next I cut the a side panel to measure 10" x 14" (the dark pink fabric in the photo below). I placed a piece of batting behind the side panel and quilted it (simple cross-hatch).   I repeated this for the second end panel/pocket.     
I quilted the side panels before adding the pockets.
Once the side panels were quilted I trimmed them both to measure 8½” wide by 12” high and I rounded off the top corners using my Frixion pen (it disappears once ironed - very clever).   I lay the two pockets on top of the quilted side panels and pinned them in place. 
I drunk the tea before using the mug as a template.
I didn't want splashes on my new sewing machine cover - well not on the first day of use anyway!
Then it was just a case of pinning and stitching it all together which was made easier by those rounded corners.  Finally I bound the bottom using 1¼” scrappy binding.

I can fit cables into one pocket  .....
.... and my 12” x 6” cutting ruler, Dresden template and other notions in the other pocket. 
   
If you want to add a handle gap to a sewing machine cover you have already made then take a look at Quilty Creations’s version.  
Quilt Creations Sewing Machine Cover
Karen uses a small piece of fabric to create the handle lining  and I think this could be incorporated into an already made sewing machine cover (she also details how to make her own cover complete with side pockets).

Don't forget to share a photo of your cover - old or new - over at the Across the Pond Flickr group.

Until next time .......

Sunday, 4 January 2015

Patchiqué Blocks 38 and 104 - Fabric Crumbs

Patchique Quilt Layout
Here we are, at the end of the Patchiqué trail.  It started nearly 14 months ago in October 2013 when I set out to make two blocks every fortnight – one patched and one appliquéd from Susan Briscoe's wonderful Japanese Taupe Quilts book.  It ends this week with the final two blocks completed making 46 blocks in total – enough for a bed quilt.
Block 38 from Japanese Taupe Quilts
Patchwork block 38 ‘Kasuri juji hishi’ (translated as Kasuri diamond crosses) is quite a complex block made up of 81 pieces.  It doesn’t look like it has so many pieces but trust me – there are 81 small pieces.  In spite of this I have to say that I really enjoyed this block.  The diagram and instructions in the book were impeccable, as always, so it went together really well – and fairly quick too. Okay, my block isn't perfect but it is good enough for me (perfection is so overrated don't you think?)
Patchique Block 38 - Patchsmith Style
So nothing to report except – give it a go, you will be pleasantly surprised and hopefully, very pleased with the end result.
Block 104 from Japanese Taupe Quilts
I was expecting the patchwork block to be quite tricky so I chose a simple appliqué block to mark the end of this journey – block 104 ‘Hachi hon ogi guruma’ (eight fan wheel).  However, this block proved useful for using up some of the fabric crumbs left-over along the way. 
Patchique Block 104 - Patchsmith Style
And so these two blocks lead us to the end of a thoroughly enjoyable foray into the world of Japanese patchwork and applique.  I hope you have enjoyed tagging along.  I have certainly enjoyed the consistent company and skill of Susie over at Susie’s Sunroom as she joined me step-by-step along the trail (be sure to check out all her blocks over at the Flickr group– they are in beautiful hues that blend East with West seamlessly).  
Susie's Chrysathemum Block No. 114
And be sure to check back later in the year when I shall post pictures of the finished quilt bound and quilted.

For 2015 I shall be concentrating on using up some more ‘fabric crumbs’ on the Farmers Wife quilt blocks – nothing organised – just a block or two here and there. And I know I shall also be returning to Susan Briscoe’s “Japanese Taupe Quilts” book to try out some of those really tricky blocks that have over 100 fabric crumbs in a 9½” square. 

Sew until next time .......

Thursday, 1 January 2015

2015 - The Year of the Fabric Scrap

Year of the Scrap
I am naming 2015 the year of the FABRIC SCRAP.  Yes, you heard it here first - this is the year to use up those charm squares, candy squares, off-cuts and scraps that you've accumulated.   I am planning on using up many of my fabric scraps over the next twelve months as I make functional, useful things to keep and to give.  Of course that includes many, many mug rugs but right now I am in desperate need of a new sewing machine cover so that is this month's Across the Pond SAL project.

There are so many wonderful FREE tutorials and patterns available that choosing which to make is almost as hard as choosing which scraps to use first!   Here are just a few to whet your appetite....
Our own wonderful Susie's Sewing Machine Cover

Sew Delicious's Patchwork Cover

'Notes from the Patch' Unquilted Cover complete with Side Pockets

The Union Jack is a panel so it could easily become Stars-and-Stripes

The Long Thread's Free PDF Pattern

During Quiet Time's Stunning Cover

Ellyn's Place Sewing Machine Cover - love the button idea

Sew Inspired - so easy.
And here is one from Cotton Creations complete with GIANT rick-rack specially for our Amy (Amy loves playing with rick-rack, trim and fabulous fabric combinations) ....
Cotton Creations Tutorial over a Pine Needles
My machine is very small (15” wide x 12” high x 8” deep) as I need to take it out and about with me.  For this reason, I have decided to use the patchwork cover from Sew Delicious as inspiration but make a few changes (pockets on the side panels for stencils and cutters, a rounded top to fit snuggly and a hole in the top for the sewing machine handle to poke through).  
Pretty fabric scraps get a new lease of life
I will detail how I make these alterations next week but to begin I created the main panel using 4½” squares from fabric scraps left over from the Wishes SAL and some Bonnie & Camille off-cuts.
Side Panels with lined pockets
The two side panels, complete with pockets, are ready for quilting before I shape the top of them. Pop back next week to see how this project comes together.   

In the meantime, pop over to Susie's Sunroom to see what she's up to.  And if you have a cover you've made, whether recently or an old favourite, then be sure to post a photo of it on the Across the Pond Flickr group.  We all need a little eye-candy-inspiration.

Sew until next time .....