 |
| Block 37 - Elephant |
This
week we are tackling the hardest block in the book so I have lots of photos to help you. But before I do please note
the following two small amendments:
Step 14 – you should make a diagonal mark on the (S) background rectangle 1” in
from the top right-hand corner down
to the bottom right-hand corner as shown in
the diagram; and
Step 16 – you should
add the (R) background rectangle to the right-hand
side of the unit created at step 15 – again as shown in the diagram.
If in
doubt follow the diagrams as they are correct.
So
let us begin.......
Step
1 is simply to mark the back of our squares for the quick corner triangles. Steps 2, 3 and 4 is where the stitching begins as we create background quick corner triangles onto the A, B and C elephant pieces.
We also stitch a background rectangle to the right side of the C/O unit. (If you are ever unsure about what pieces go where just look at the diagram at the start of the pattern – it shows
all the pieces.)
We continue with quick corner triangles for steps 5 and 6 as we begin to make the trunk unit.
After step 7 you should be able to see the curve in the trunk.
After step 7 you should be able to see the curve in the trunk.
Steps 8 and 9 complete the trunk with addition of a simple three-square-unit created at step 8.
At
step 10 we join the trunk to the bottom head unit created at step 3.
Next we complete the head by adding the unit created at step 4 to the top of the trunk unit. This unit should now measure
3” x 4”. (Did you know all Patchsmith measurements are given in the format width
x height?)
At step 12 we resume our quick corner triangles to start on the elephant’s ear. Remember this is your elephant – he
can have whatever colour/pattern ear you want.
Once the ear section is made we are ready to join all three units together at step 13 to create the body of the elephant.
Next we create the top of the ear by marking the (S) background rectangle 1” in from the right-hand corner running
diagonally down to the bottom right-hand
corner – look at the diagram on page 41 to see how to mark the rectangle. Lay onto the (J) ear rectangle at right angles and stitch along the marked line
.....trim and press open .....
Next stitch the (R) background rectangle to the right-hand side of the unit created at step 15 – (not the left-hand side as stated in the pattern). Follow the diagrams as they are correct.
Stitch the top ear unit to the top of the elephant body at step 17.
Next we make the legs (toes are optional). Follow
steps 18 and 19 to create two toe units.
If you are not adding toes you will still need to complete step 18.
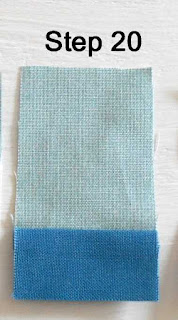
Step 20 will create two leg and feet units each measuring 1½” x 2½”.
And
step 21 will join the four units created at steps 18, 19 and 20 together to
create the bottom elephant unit.
You are now ready to complete the patchwork Elephant block by stitching the elephant’s legs to the elephant’s body.
To
finish add an eye to the elephant (I marked it in place first and used a simple
overstitch using two strands of embroidery cotton).
Phew
– there we have it. One really cute
Elephant Block.
 |
| Block 37 - pretty in pink |
I look forward to seeing your blocks over on Instagram (#block 37elephant) or in the Flickr group. Next week we will be back to a quick and easy
applique with block – Night Owl.
 |
| Block 38 - Night Owl |


Beginner quilter but want these in 12 inch block....Need help as to how to change measurements.
ReplyDeleteHi, this is the most complicated pattern in the book. Unfortunately I have only designed it for a 6" block at this stage. If this changes I will blog about it.
DeleteKindness
Amanda