Pages

Tuesday, 26 June 2018

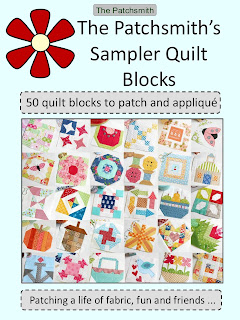
Patchsmith Sampler Quilt Blocks in Paperback

GOOD NEWS
The Patchsmith’s Sampler Quilt Blocks pattern book is now available in paperback 


To see all the blocks included in the book click on the 'Patchsmith Sampler Blocks' tab above.  You will find links to the sew-along tutorials that accompany the blocks.

I hope you can join me as we create a life of fabric, fun and friends.


Monday, 25 June 2018

Patchsmith Sampler Block 17 - London Roads

Block 17 - London Roads 

Nearly every town in England has a road called London Road. It was along these roads that the suffragettes marched towards London a century ago.  Hence the four arrows leading in the same direction around a central square in the London Roads block.

This block is my favourite block from the book.  It is so pretty and once you have got the hang of Skinny Triangles it goes together quite easily as I have designed it so that it doesn’t need matching seams. 
Two-tone London Roads Block

So how to do those SkinnyTriangles. I was first introduce to Skinny Triangles a long time ago by Karen Hellaby and a great little book called ‘Sew a Row Quilts’. Skinny Triangles are perfect for this block and I have a little tip to help you get them just right.  

For each arrowhead you will need two (C) background rectangles with marked diagonals which are a mirror image of each other. 
Follow steps 2 and 4 to create these rectangles

You will also need to mark the (D) arrowhead rectangles as detailed in step 2 of the pattern. Once done you are ready to sharpen the arrowhead.

Firstly, with right sides together, lay the background rectangle with the mark running from the top right-hand corner to the bottom left onto the (D) rectangle so that the diagonal line runs from the mark at the top of the (D) rectangle down to the bottom right-hand corner as shown.

Pin to keep the pieces in place to stop them slipping whilst stitching.

Then stitch along the marked line.

You are now ready to trim and press the triangle open and here is my tip:  finger press the corner open BEFORE trimming the corner. This is to ensure that the skinny corner covers the corner of the (D) rectangle completely before you trim the fabric.   If your stitching is not accurate you may find the (C) corner does not completely cover the corner and you will be able to unpick and restitch the skinny triangle if you have not trimmed it.
You can see that the Skinny Corner covers the background rectangle completely.

Once you are happy with your corner, trim it .....

and press it open .... 
One Skinny Triangle complete

Now you can make a mark along the top edge as detailed in step 4. 

With right sides together, lay the background rectangle with the mark running from the top left-hand corner down to the bottom right corner onto the arrowhead unit so that the diagonal line runs from the mark on the top edge down towards the bottom left-hand corner.  

Pin and stitch before trimming and pressing (remember the tip – it works this side as well).

The arrowhead unit should measure approximately 2½” x 3”.   You can now trim the bottom of the arrowhead unit to create an arrowhead that measures 2½” square.
Trim the bottom of the arrowhead to size (I have turned it on its side in the photo)

Once you have made all four arrowheads it is a simple case of stitching the block together.  And there you have it – a London Roads block.
Join the blocks into rows and the rows into one London Roads block

And remember - three arrows make a great sidebar to turn any of the blocks from the book into a fun mug rug.
Three Arrows Sidebar turns block 9 'Bullseye' into a fun mug rug

As this is my most favourite block from the book I thought it might be a nice treat for me to share the cutting sizes/instructions  to make a 12” London Roads block (finished size).
12" London Roads Block

To create a 12” (finished size) London Roads block cut:
A – One 4½” center square
B – Eight 1¾” x 4½” background rectangles
C – Eight 2½” x 5” background rectangles
D – Four 4½” x 5” rectangles (arrowheads)
E – Four 2” x 4½” rectangles (arrow tails)

Follow the pattern.  At step 2 make a mark on the D rectangle 2½” in from the right-hand side and at step 4 make the mark 2½” in from the left-hand side.  At step 6 trim the bottom of the arrowhead so that the finished arrowhead is 4½” square. 
Red, white and blue London Roads
I hope you'll have a go at Skinny Triangles as we use them again for Block 34 - Birdhouse.  Until then share your London Road blocks over on the Instagram (#block17londonroads) or in the Flickr Group Until next time .....

Monday, 18 June 2018

Patchsmith Sampler Block 16 - Jigsaw Block

Block 16 - Jigsaw

You may have come across this week’s block before as I introduced it a year ago as a free block pattern to highlight Autism awareness month.  The free block pattern includes cutting instructions for both a 6” and 12” Jigsaw block so be sure to download it even if you already have the book.  Just click on the link below.


This week’s Jigsaw block is a perfect beginner block as it doesn’t really matter if your seams don’t match or they are not exactly ¼”. 
Pastel Jigsaw Block

It is aslo perfect ‘blender’ block in so far as you can use offcuts of fabric used elsewhere in the quilt or you can use a limited colourway.
Two-tone Jigsaw Block

It reminds me of my Jigsaw mug rug pattern which is also a great for beginners.
Jigsaw Mug Rug

Next week we tackle ‘skinny triangles’ for the first time when we make Block 17 – London Roads.  In the meantime I look forward to seeing your block photos over on Instagram (#block16jigsaw). Until then …….

Monday, 11 June 2018

Patchsmith Sampler Block 15 - Cornerstones

Cornerstones Block (VERSION 1)
Once upon a time in a land far away there lived three women – a huge woman; a middling size woman and a tiny, very slim woman  (who could seriously do with eating more cake!). 

The three women spent their time following The Patchsmith on Instagram and Flickr.   But they spent most of their time arguing amongst themselves over the perfect size block to make.

The huge woman liked to make very large blocks, whilst the tiny woman liked to make very small blocks.  The middling size woman however, found the 6” blocks in The Patchsmith’s Sampler Blocks pattern book to be just the right size.

Cornerstones Block (VERSION 2)

Thankfully there was one block that suited all three women – the Cornerstones block.

It contained one large cornerstone to keep the huge woman happy........

Eight small cornerstones to keep the tiny woman happy ........

And four cornerstone squares that were just right for the middling size woman .....

And so a contentment descended upon the home of the three women as they set about stitching their own Cornerstones Blocks.
Cornerstones Block (VERSION 3)

Truth be told, all three women liked to play with fabric and this block didn’t disappoint.   It was such a quick and easy block to put together that they would’ve had time to clean the sewing room if only they could agree on the size of broom needed to sweep the floor!

If you want to make your own Cornerstones block you will find it in The Patchsmith's Sampler Blocks pattern book.  You will also find it in the Patchwork Corners Mug Rug pattern - a simple mug rug pattern that is tailor made for the beginner mug rug maker.
One of two versions included in the Patchwork Corners Mug Rug pattern.

The second version included in the Patchwork Corners Mug Rug pattern.

Until next time .....

Monday, 4 June 2018

Patchsmith Sampler Block 14 - Friendship Block

Block 14 - Friendship

Patchwork and quilting is as much about friendship and connection as it is about fabric fun and so we come to the Friendship block.
Primary fabrics work really well with Block 14.

This block uses half-square triangles and quick corners to create four friendly corner squares which, when joined together forms Block 14.
Just two fabric friends come together in this version.

We have already covered half-square triangles with Block 2 ‘Guiding Star’

And we covered quick corners with Block 3 ‘Watermelon’.
Block 3 - Watermelon uses quick corners

To make sure the points on your Friendship block stay sharp you might like to press the seams on the top left and the bottom right units at step 4 towards the contrast fabric and the top right and bottom left units away from the contrast fabric.   This will help when nesting the seams.
Pressing the seams of the Friendship Block

If you intend to quilt in-the-ditch however, you may prefer to press all the seams away from the contrast or open.

To see all the blocks in the book and to click through to the tutorials select the 'Patchsmith Sampler Blocks' tab above.

In the meantime I look forward to seeing your block photos over on Instagram (#block14friendshipblock) or in the Flickr Group.  Until next time ......